For Cheque printing it is required to setup the design of the cheque leaves as per the cheque book that has been provided by the bank. This is done through Cheque Design Template.
In order to access the Cheque Design Template, click on the Cheque Design Template tab in Fig. 4.1 or Select from the Menu
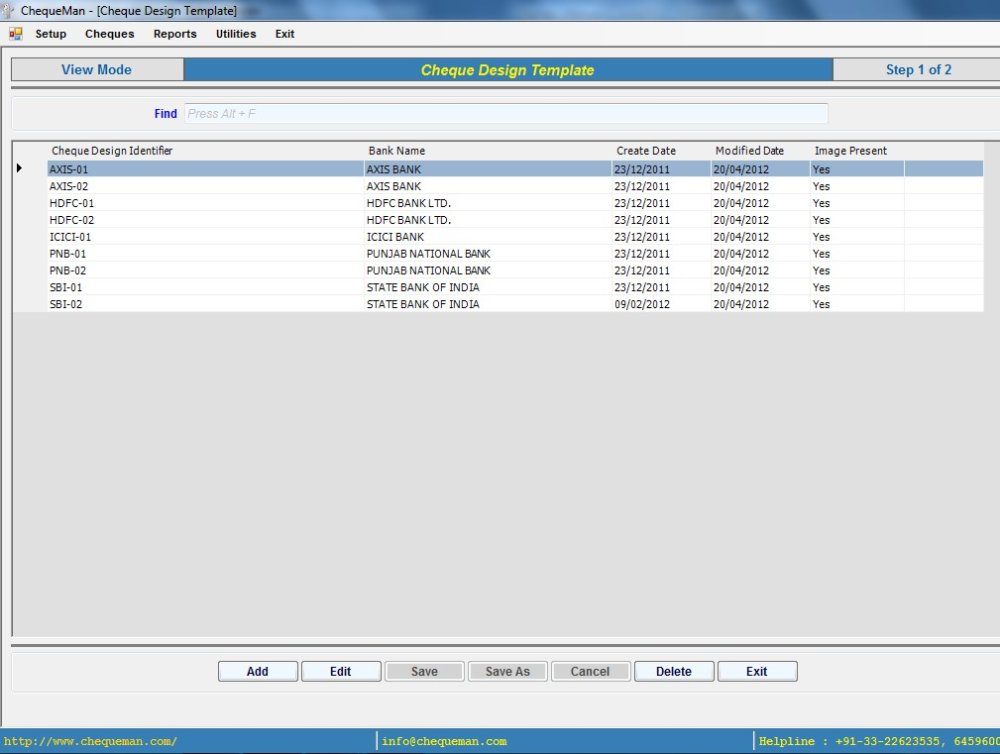
The following screen will be displayed:
A list of all the existing Cheque Design Templates that have already been created will be displayed in a tabulated box. It may also contain some of the pre-created formats of a few banks.
In order to create a new cheque template, click on the button displayed below.
Select Bank Name (Mandatory) : Select the Bank from the drop down box.
Cheque Design Identifier (Mandatory) : Enter an appropriate name for this cheque.
Note: The Identifier is for your reference and can be a short abbreviation for convenience in understanding and remembering.The middle part enclosed between two measuring rulers is the place where the cheque template is designed. The printing components, in a cheque, are as follows:
- Date
- Payee (Line1)
- Payee (Line 2) – Optional – as many formats does have this provision *Amount in Words (Line1)
- Amount in Words (Line2)
- Amount in Figures
- A/c Payee Symbol
- Not Over (Optional – through Preferences Advance)
- Rubber Stamp (Optional – through Preferences Advance)
- Account Number (Optional – through Preferences Advance)
The design of the cheque can be setup in three methods:
Option 1
In order to setup the design of a cheque, measurements of each printable component of the cheque (as explained above), can be setup individually.
For each printable component on the cheque, measure its distance from the top of the cheque and from the left edge of the cheque and measure its width. These measurements have to be in millimeters (mm). Example to find out the measurements of the component ‘Payee Name 1st Line’ is shown below:
Select the printable component, Payee in this example, by clicking on it. Enter the measured distances in the slots labeled as Top, Left & Width and accordingly it will move and set itself at the desired place.
You may also drag & drop the printable component at the desired location. For altering the width, one can also use the mouse; the same is done by dragging the small square present on the sides of the component.
Note: Measurement of each printable component of the cheque has to be defined separately. After designing each printable component of the cheque, save the template by clicking on the buttonOption 2
To simplify the process of measuring as explained in Option 1, one can insert the scanned image of the Cheque into the template using the Cheque Image’ button.
Select the scanned image file of the cheque from your computer as shown below:
Click on the button. Once the image is placed, the printing components can be dragged and dropped in alignment with the cheque. The printing width can also be accordingly adjusted (as explained in Option1) as per the image.
Note: Care should be taken that before importing the scanned image all the unused spaces in the sides of the cheque should be cropped.Option 3
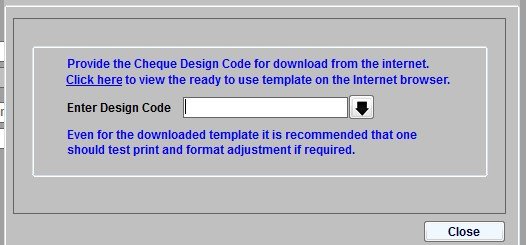
For the convenience of ChequeMan users, a library of pre-designed templates has been uploaded on internet (web) platform. In case the format desired is available on the web, one can directly import the design template by providing the Design Code after clicking
This option is enabled only in the presence of the internet connection. A link is provided to view the available formats on the web. Click on to view the webpage:
The following window will appear, displaying the list of all the bank names available in the software library:
Click on your bank in the above page, to display all the available cheque formats for this bank. Every cheque format is provided with a design code, as shown below:
Note the design code of the desired template from the above page, specify the Design Code in the software and click on 
It may take up to a couple of minutes for the process, depending on the connectivity speed. Once imported, the cheque image with pre-arranged printing components will be displayed on the screen as displayed below:
After completing the designing part, click on the button to print a sample of the template for previewing and testing the format adjustments.
Once done click on the button. The saved entry will be displayed on the grid.
Note: It is recommended that you should keep some blank paper that is cut in the size of the cheque leaf for the testing purpose. A few of such blank paper have been provided for testing purposes (with Licensed Version). Owing to many factors, there could be some discrepancies, which one will have to correct by adjusting the placement of the printing components.Modify an Existing Design
From the main grid, double click on the design that needs to be edited. One may also select the design on the grid and click on button.
The design will be displayed with its current settings (including the Cheque image, if inserted earlier). One can make necessary modifications and
After making the modifications, if one desires, this changed design can be saved in a different ‘Cheque Design Identifier’ through the option. By doing so, the earlier design is not disturbed and a new design will be created with minimal effort. This is very useful when minor changes takes place in the format. The earlier format remains intact for the cheque leaves printed earlier and the modified format can be used to print newly received cheque leaves.
Deleting an Existing Design
Designs can be deleted from the main grid by selecting and clicking on the button. After seeking your confirmation it will go ahead and delete. Note: Deletion is only possible if the selected design template has not been attached to any Cheque Book. In other words only unused design template can be deleted.
Need more help with this?
ChequeMan - Support


